Industrial VS Commercial VS Residential Electrical Installation

Hey, in this article we are going to see the comparison between Industrial, Commercial, and Residential Electrical installation. We will make compare with respect to types, procedure, cost, safety, equipment, and many other essential factors. First of all, let's know what is electrical installation. Electrical installation is a procedure to install electrical circuits, wirings, equipment, and machines. The electrical installation can be divided into three major parts - 1. Installing of electrical equipment or device or machine 2. Make electrical connection or wiring for them 3. Provide them proper voltage and power to operate them. These different types of electrical installation required different types of electricians and management. For example, commercial electrical installation requires commercial electricians, industrial electrical installation requires industrial electricians, and residential electrical installation requires residential electricians. We already published an ...

What Is a Multimeter and How Do I Use It

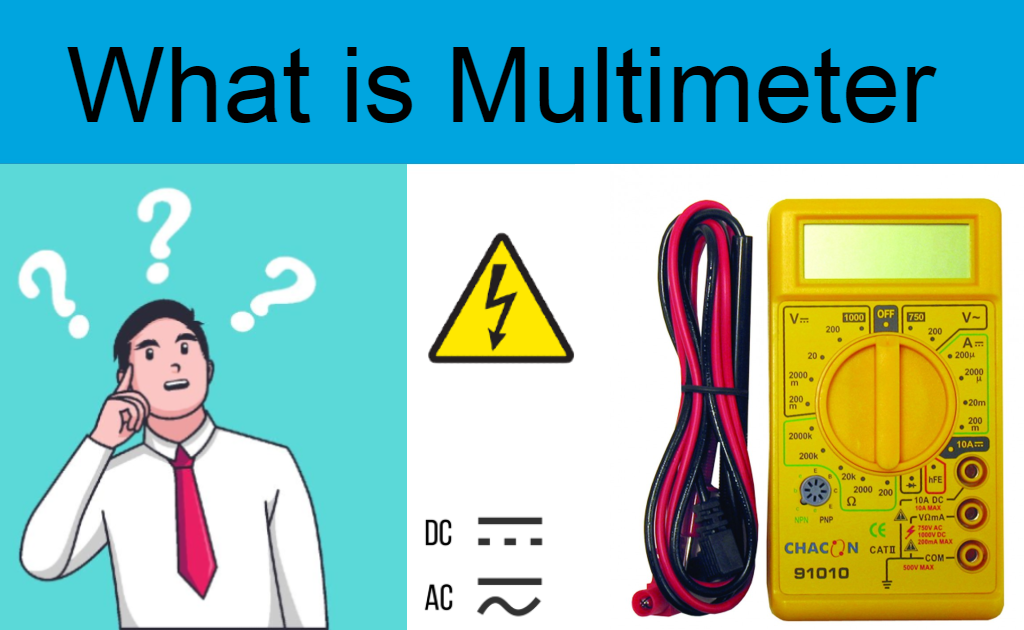
What Is a Multimeter

Multimeters are electrical or electronics test instruments that are used to determine multiple values such as voltage, current, resistance, diode test, continuity test, and many more.
What Is a Multimeter

Every repairman should be familiar with a multimeter, which has multiple applications for checking electronic components and circuits. Today, we'll go over three of the most fundamental multimeter features for evaluating continuity. Resistance and voltage Let's begin with a continuity test

Continuity Test

A continuity test determines whether or not two objects are electrically linked. An electrical current can flow freely from one end to the other if something is continuous. If there is no continuity, this indicates that there is a break somewhere in the circuit.

This might suggest anything from a blown fuse or a poor solder joint to a broken cable that prevents a continuity test from being performed. Begin by connecting your probes. The black probe is inserted into the negative terminal labeled "labeled common" or "common," while the red probe is inserted into the volts ohms milliamps terminal. Check if your dial is in the continuous mode, which is generally denoted by a sound wave symbol. If your screen is like mine, it will have one on the left side of the screen. The multimeter checks for continuity bypassing a little current through one probe and seeing if the other probe receives it. Touching the probes together will demonstrate this. We hear a buzzer and get a readout.

The probes that are linked form a complete circuit. The LCD should show a value of zero or close to zero, and the multimeter should beep. If this happens, you'll have continuity. If you don't hear a beep and the display stays at one or changes to O L, you have an open loop. We can tell from this damaged cable that there is no continuity reading, but perhaps we can rescue the rest of the cable. So, before the break, we're going to test the cables. 

We receive a buzzer and a reading that is close to zero. You may also test DC voltage using your multimeter. It's difficult to determine how much energy is left in your battery, so use your multimeter to check the voltage before discarding it. Begin by plugging in your probes. Read the leads to the port labeled with volts, ohms, and mil amps symbols. If you have an auto-ranging multimeter, excellent; if not, you'll need to choose the right range for the voltage you anticipate to measure; if you're unsure, start with the highest setting and move lower to acquire a more precise result. If you go too low, your multimeter will display "oh L," which simply indicates that the voltage is out of range. Also, if you're monitoring voltage, make sure your meter isn't set to amp mode. 

This might easily cause your meter to blow a fuse during the test. If I found this 9-volt battery in a drawer, I have no clue if it's safe to test it. The red probe is connected to the positive terminal, while the black probe is connected to the negative. If you obtain a negative reading, it simply implies that the leads are reversed. Because this is a fresh new 9-volt battery, the readout is barely above 9 volts. Resistance is measured in ohms and is represented by this symbol on a multimeter. To test resistance, you must select the range in the same way as you do for voltage.

If the multimeter reads close to zero, the range is set too wide for accurate measurement. Reduce the setting on the dial. It makes no difference which probes are used when resistance is asymmetric. You now understand how to use a multimeter. 
Comments

Popular posts from this blog

What is the Joule Thief Circuit and how does it work

A joule thief is a compact, low-cost, and easy-to-build self-oscillating voltage booster that is often used to drive small loads(3.3v 5mm LED). Other names for this circuit include blocking oscillator , joule ringer , and vampire torch . The circuit is a blocking oscillator variation that functions as an unregulated voltage boost converter. The output voltage is increased at the price of a larger input current draw, but the output integrated (average) current is reduced and the luminescence brightness is reduced. This joule thief Circuit uses a 1.2 V or 1.5 V single-cell electric battery to power LEDs. However, as the supply voltage reaches 3V, the LED begins to light. The theory of operation of a Joule thief circuit Joule Thief Circuit The joule thief circuit operates on a fairly basic basis. It operates by quickly switching the transistor. When the transistor is first switched off, a tiny amount of current flows via the resistor, primary winding, and base-emitter junction, assistin...

What is an electric fuse | Fuse resistance | Functions

To avoid a short circuit or device failure, an electrical fuse is a low melting point copper or other metal wire that breaks due to heat-induced by Overcurrent or excessive load. The flow of electric current warms up the items through which it passes. Electric water heaters, light bulbs, and irons are just a few examples of electric gadgets that make use of this phenomenon. It does, however, have certain downsides. For example, if this equipment becomes overheated, it may become damaged or even catch fire! In reality, the undesirable high electric currents harm not only these gadgets, but all of the appliances in our home. Any gadget can only withstand a certain quantity of electric current. If the current surpasses that limit, the device's components heat up, perhaps resulting in a fire! Is there a way to prevent this from happening? An "electric fuse" is a device that is used to prevent this from happening. It comes in a variety of forms and sizes. This is how it usuall...

Using the IR2110 high-low side driver - explanation and circuit examples

In many situations, we need to use MOSFETs configured as high-side switches. Many a times we need to use MOSFETs configured as high-side and low-side switches. Such as in bridge circuits. In half-bridge circuits, we have 1 high-side MOSFET and 1 low-side MOSFET. In full-bridge circuits we have 2 high-side MOSFETs and 2 low-side MOSFETs. In such situations, there is a need to use high-side drive circuitry alongside low-side drive circuitry. The most common way of driving MOSFETs in such cases is to use high-low side MOSFET drivers. Undoubtedly, the most popular such driver chip is the IR2110. And in this article/tutorial, I will talk about the IR2110. Notice that the IR2110 comes in two packages – 14 pin through-hole PDIP package and the 16-pin surface mount SOIC package. Now let's talk about the different pins. VCC is the low-side supply and should be between 10V and 20V. VDD is the logic supply to the IR2110. It can be between +3V to +20V (with reference to VSS). The actual voltag...